Configuring and defining the skin Icon and Preview
01/15
You must be need to Download the UI Icon.psd File.

02/15
You must be need to Download the Preview.psd File.
03/15
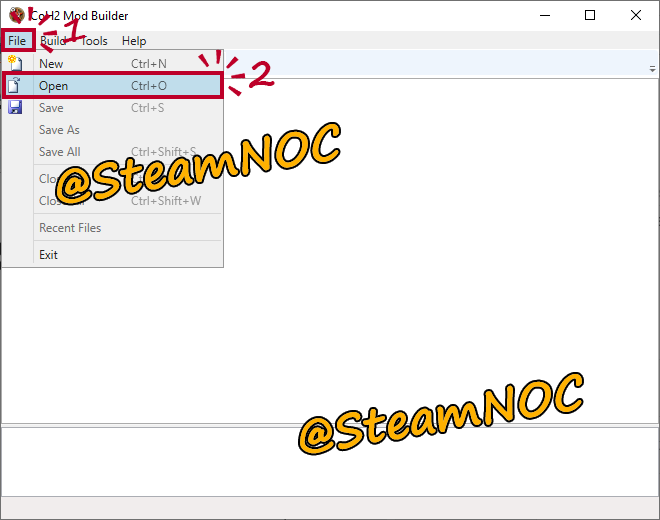
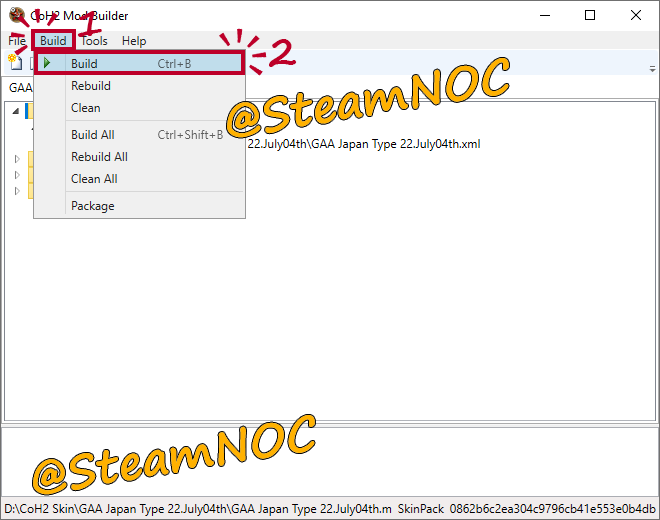
Run the Company of Heroes 2 Tool and
When CoH2 Mod Builder appears, click File in the menu and click Open.
04/15
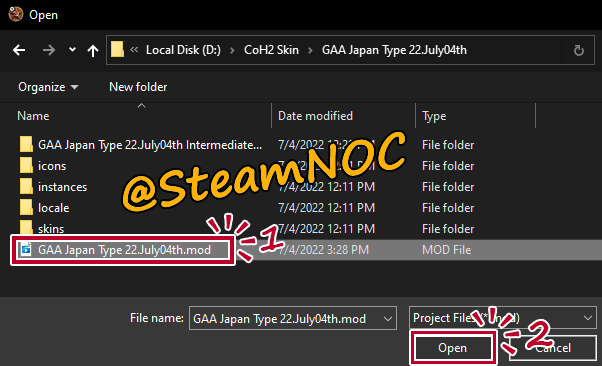
Open the mod file in your folder.
05/15
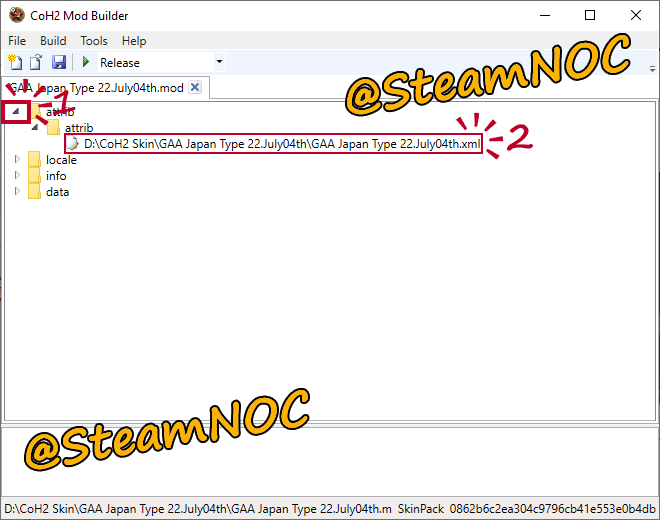
Double Click on XML in the attrib.
06/15
Wait until Attribute Editor runs and reads the XML file completely.
07/15
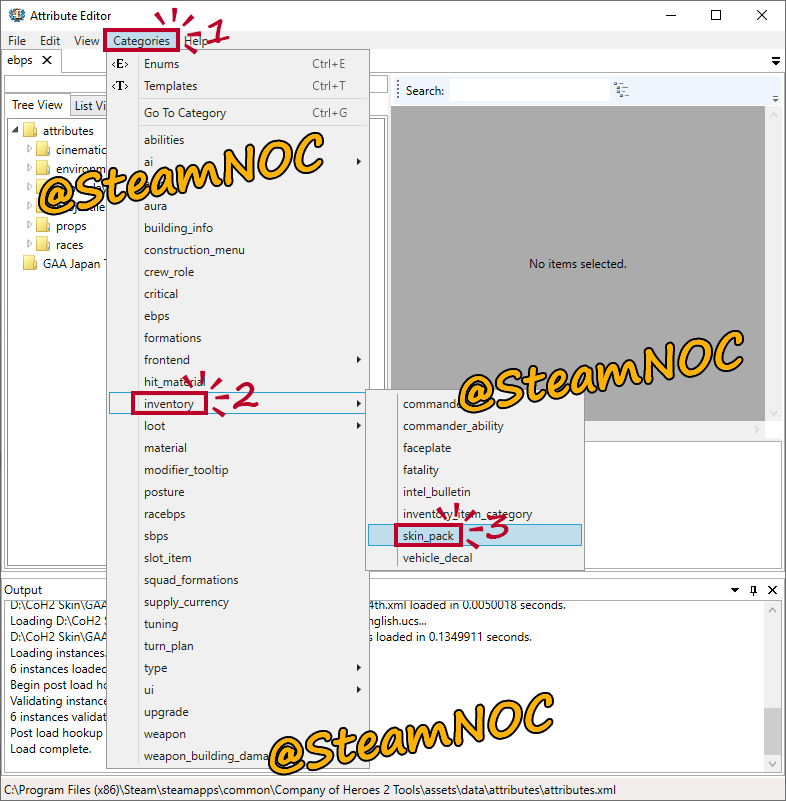
If you don't see the skin_pack tab, click category and click skin_pack in inventory.
08/15
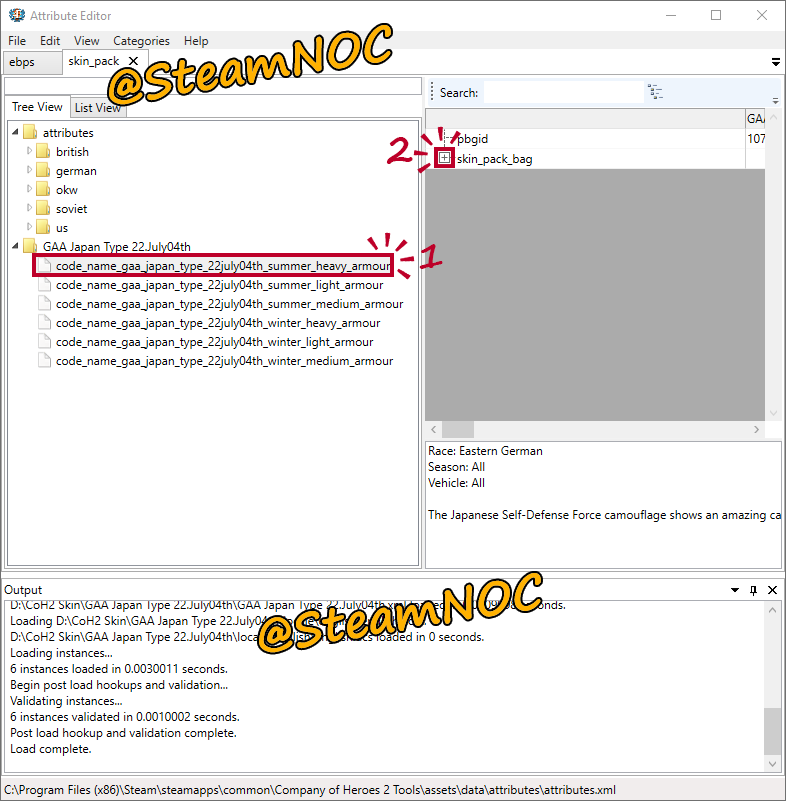
Click items on the left, and click the plus of skin_pack_bag on the right.
09/15
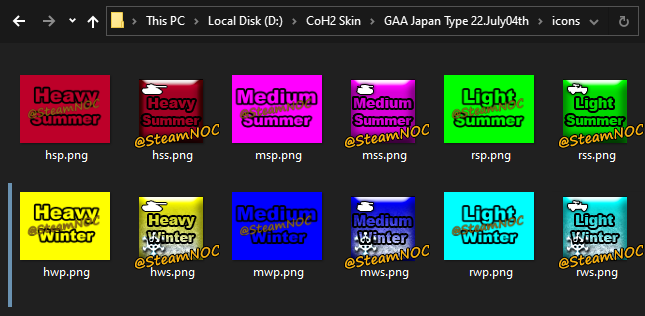
Place the Icon and Preview image in the icons folder.
You may delete the question mark icon file.
※File's names must be entered in lowercase letters.
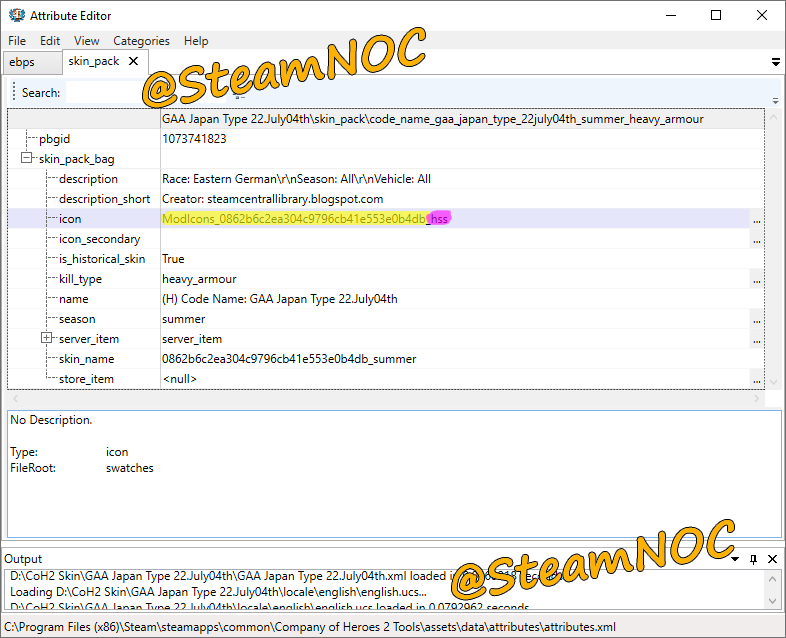
10/15
If you look at the Icon paragraph, there is a paragraph like this.
ModIcons_0862b6c2ea304c9796cb41e553e0b4db_Icon
Double click on this paragraph, delete only the Icon and type hss.
It must be entered in lowercase letters.
※Names must be entered in lowercase letters.
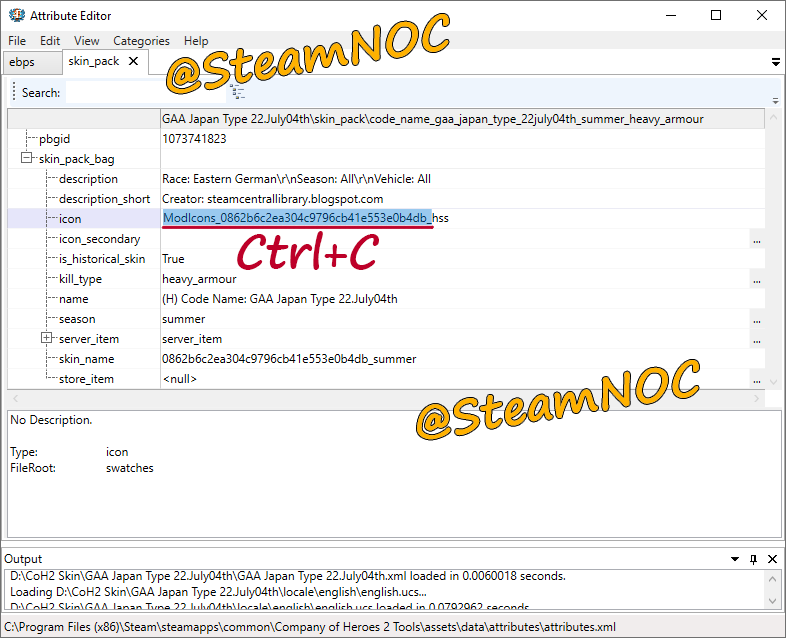
11/15
Double click and drag the icon paragraph to copy it by pressing Ctrl+C while selecting the entire paragraph.
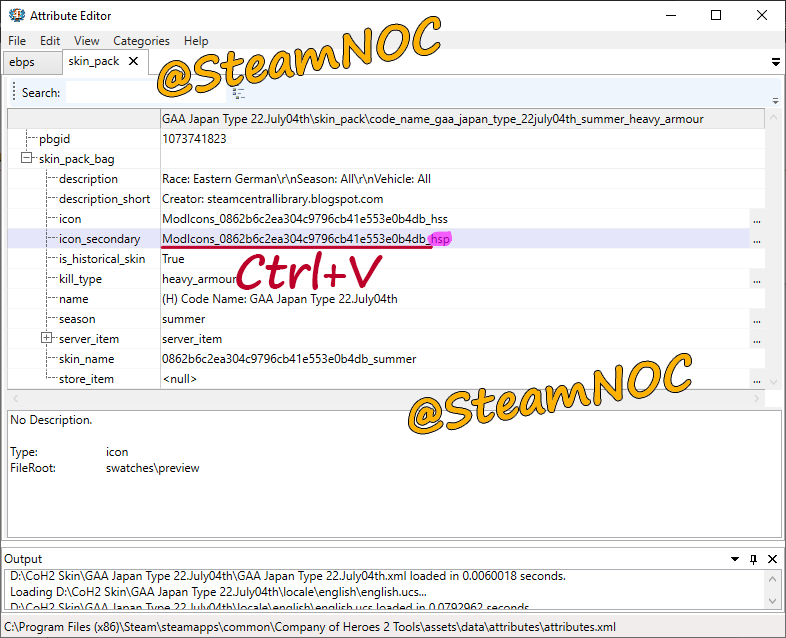
12/15
Double click the icon_secondary paragraph and press Ctrl+V to paste it, then type _ followed by hsp.
Define the rest of the UI Icon and Preview in the same way.
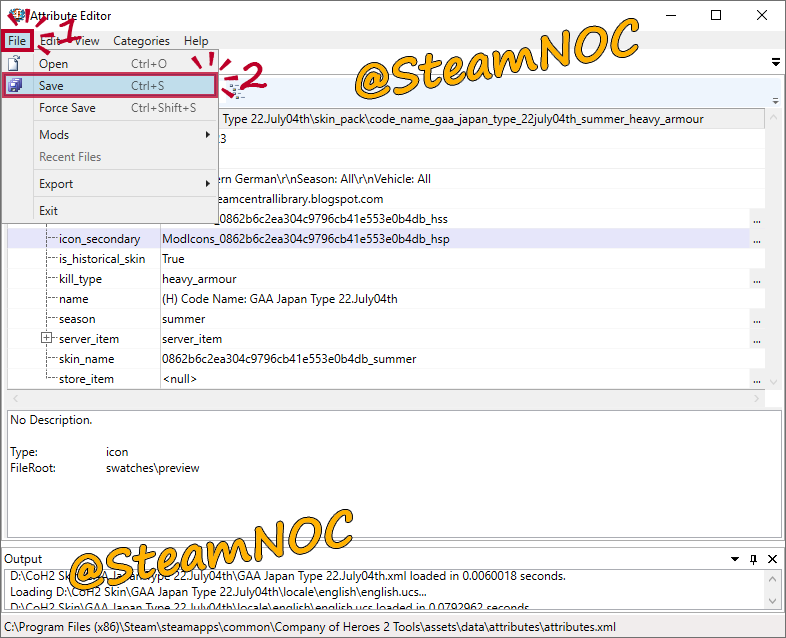
13/15
Define Icon and Preview for each item on the right as described in No.08~12.
When you're done configuring, save it.
14/15
Click Build to upload the Mod.
15/15
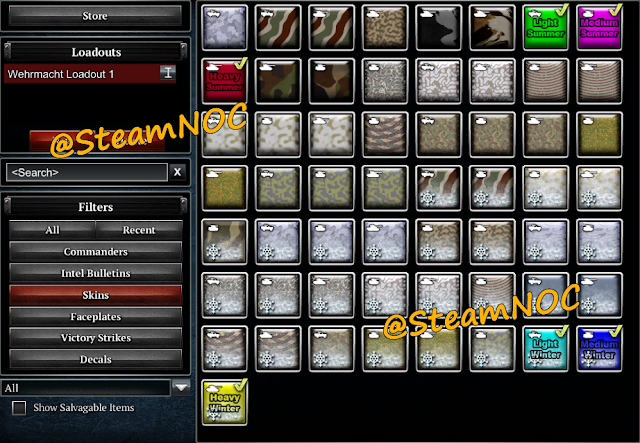
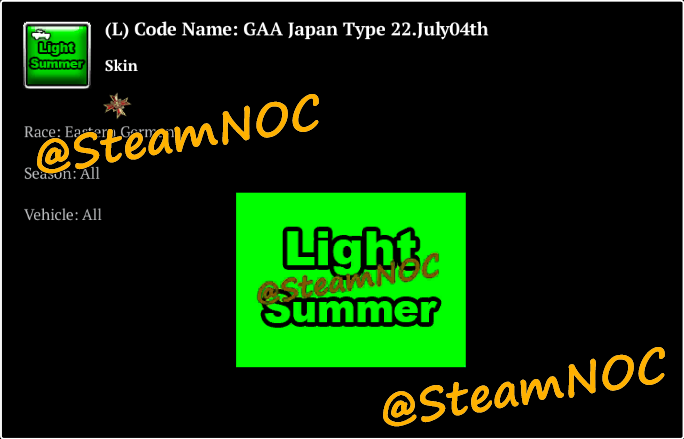
Launch CoH2 and click Skin in the Inventory.
You may see that the Icon and Preview are well applied.


![다크에덴 [2023 최신 가이드] 장비의 티어를 올리는 방법](https://blogger.googleusercontent.com/img/b/R29vZ2xl/AVvXsEg63vB4hhXTgw_I_8yWV6rlxZpfALmx0vnLxVd6IzsGuiWZaJm9It9liDr_QDxcVAHz0VcDqSSkc9a5zW0DL5-3SHflXEe856MpFydUvhLr9PY-NjLNtVeIVx2lyajG_6dv5XN-fNBslxSU7SDQSfUjb06rjOTSb2n3O96h57N3FGU8BzsZrlu_Kih4gg/w680/20230504_081023.png)
![다크에덴 [던전 정보] 리피니움 광산](https://blogger.googleusercontent.com/img/b/R29vZ2xl/AVvXsEgCGRwGrneNvxWWiEMjADJwcOsHLLz3smPswzikisrfhqCYUNfZViOw4wiYTFt6EWQd_u1gUfRtkAnSSYx5mHDFNypgt09ZwSNlVoSuIaJqA3Il106l7AOlQmuVZoEg5z27rU0vH09BV88U77mokso3wsDSiG7rfJEdGNfYPrrWedrhcVtwVR4Q8tCGHg/w680/20230505_093718.png)
![다크에덴 [2023 최신 가이드] 장비에 강화 옵션 부여 및 강화하는 방법](https://blogger.googleusercontent.com/img/b/R29vZ2xl/AVvXsEidVWrheMqOWCwdYWYVbvim_Mwo4f9eAUn1EJjzE1O9I8sh2sPPdEYU7f8irFSUdrUBlF0wgbZ4m542JGGuW5K231snM6E1IHR9rhbvnjleAuYi6UHmPlG96OpGG-_OcR3TmjGGkCEwph4hjk88tSR4okY-vc6dSL0eykQEO0A-p8dIbAEE5Kf7YnnICw/w680/20230504_190019.png)
0 Comments